Please click here to see new posts:
Tuesday, December 4, 2012
Wednesday, June 13, 2012
Summer is almost here...
Many of us take time during the summer to completely unplug from the world. No cell phone. No computer. No electricity.

Not me.
But for those of you who are looking for something to do, I have compiled a list of things you can do to refresh and rejuvenate before September.
1. Get reading. Many of you have made the switch to an e-reader--they are light weight and hold hundreds of books for you to read over the summer. Here are some sites to help you find e-books to read:
Markham Public Library (3 week loan time, the book is automatically returned after this time--no late fees!)
E-book Search and Free E-books: search thousands of books for leisure reading or studying!
Flatworld Knowledge: The first and largest publisher of free and open textbooks.
2. Get Learning. Take a free online course. Click here to find a list of 500 free online courses. Many are offered via iTunes U.
3. Get Outside. Take this time to get outdoors and enjoy the free and exciting things that Ontario has to offer! Check out the discounts we get as teachers!
4. Check out the newly renovated Petticoat Creek pool and splash pad! It is the largest swimming pool in Ontario and great for all ages!
Friday, May 18, 2012
Thursday, May 17, 2012
Google Research Pane
I was working in the lab, late one night, when my eyes beheld an eerie sight....
(quick: what song is running through your head right now?)
...a research pane on the right side of my Google Doc.
Huh? What is that and where did it come from? How can it make my life (and the life of my students) easier?
The new Google Research Pane appears on the right hand side of the screen when you open up a new document in Google Docs. It allows you to search the web as you are creating the content in your document.

When you find something that you would like to add to your document, whether it be a quote, an image or a video, simply insert the item and Google, when appropriate, will also include a footnote citation so you know where you got it from.
In addition to the research pane, Google has also included more than 60 new fonts and templates for you to use when creating things in Google Docs. These new themes can be accessed when you start a new file. Simple choose 'from template' under the Create menu.
When I first introduced Google Docs to my students, I sold it as a basic version of MS Word. But with all these new features.....I might be tempted to make a permanent switch.
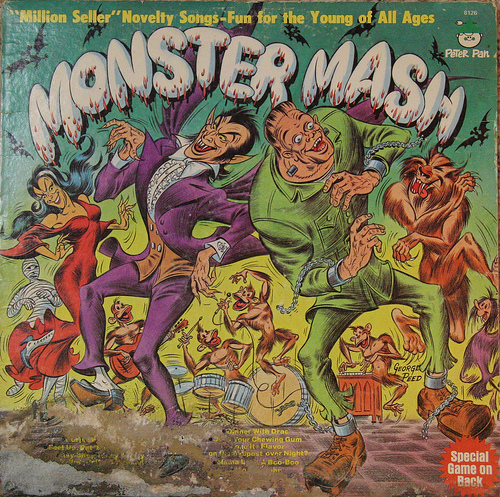
Are you still humming Monster Mash to yourself?
Google Drive
I swear, I think Google has the answer to all of my problems. Or, I've been drinking too much Google Kool-Aid.
Problem: I left my newly created, amazing, fantastic and engaging PPT lesson at home. And now my students are staring blankly at me, waiting in anticipation....
Solution: Google Drive
Up until now, the first solution that comes to mind would be DropBox, or iCloud, or Evernote--a great place to store all your files in the 'cloud' so that you have access to them from any device. But which one was the best? Which one gave you the most storage space for free? Could you really access your files at any time and from any device?
This month, Google finally released Google Drive, a simple yet dynamic add-on to Google Docs. It's like a suped-up, neon-lights on the running boards version of Google Docs.
Google Drive provides you with 5GB of free storage to store files, videos, pictures and music in the Google Cloud. You can then share and access any of these files from any device--your PC, your SmartPhone, and even the school computer (assuming you have found the hidden Firefox icon).
Google Drive is able to handle many different file types including Adobe Illustrator, Photoshop and HD video.
To access Google Drive, simply log in to your Google Account and it should appear in the black menu bar at the top. If not, click on MORE and select Drive.
Ted Ed: Lessons Worth Sharing
Early this month, TED Talks created a spin-off of their wildly popular video site. This new site, entitled TED-ED: Lessons Worth Sharing, organizes TED videos based on subject and curricular strands. For each video, TED-ED has also included a introduction to the video; a short quiz; a thinking question (which students can answer in a text box) and then extension questions/activities that will promote critical thinking.

Each video page also comes with the ability to "Flip The Lesson". The main idea behind a flipped classroom is that your students will watch/read new content at home and then come to class to work review exercises or critical thinking questions. As the teacher, you will no longer be the presenter of content, but the facilitator of understanding.
So, for this example, the students would watch the video at home, assess their understanding using the Quick Quiz and then come to class the next day prepared to discuss the answers to the Dig Deeper Questions.
What do you think?
Friday, April 20, 2012
In a Game of PPT, SmartBoard, Paper.....
...paper always win.
Today I have to rant. I'm going to rant about technology. You have been warned.

Over the past year as the Digital Literacy lead, I've done my best to investigate and try all sorts of new digital tools in the classroom. My students have been my guinea pigs as I try new things.
But the one tool I have tried to leave locked in the storage room is the Smart Board.
In the spirit of equity, I decided to do my best to give the Smart Board a chance to prove its usefulness in the secondary classroom. A few weeks ago, I spent 3 hours working with our CRT learning the in's and out's of designing a lesson in Smart Notebook. And I left with all sorts of good ideas on how to use the Smart Board in my class.

Then I searched high and low and found a Smart Board on wheels (locked in a storage room) that could be used.
And now the lesson. Okay. Open Smart Notebook on my computer. Stare at the blank screen. Watch the cursor flash. Check Twitter. Back to Smart Notebook. Watch the cursor flash. Check Facebook.
*Sigh*
Surely someone else has already designed a lesson on DNA replication for the Smart Board?
Of course! I'll just Google "DNA replication smart notebook". Done. Here it is.
Okay. Now let's get ready to teach.
The Smart Board does not roll nicely into my science lab--those pesky lab benches get in the way. So I booked rm. 117 and spent 40 min getting the Smart Board set up, played 'whack-a-mole' a few times to calibrate the board, and ran the lesson to make sure everything would work.
Bell rings. Students show up. So does another class. Double booked computer lab? No, I forgot to actually book the computer lab.

Unhook computer. Unhook LCD. Unhook Smart Board. Roll everything down the hall with 25 students following me sadly back to my classroom.
Set up everything. Play 'whack-a-mole' again. Realize that I can't actually USE the Smart Board--the lab benches are in the way. Get students to move desks. Set up everything. Play 'whack-a-mole' again.
25 minutes lost to 'technical difficulties'.
No worries. I have a great class who has learned to roll with the punches. I start teaching. There are notes, animations and activities embedded into this Smart Board lesson. The students get to touch the board.
They are engaged in the lesson. Success!
And then one (and then another, and another) says "I don't get it. How does DNA replicate?".
*silence*
I looked at the Smart Board. It stares blankly at me. I stared back.

And then I grabbed a stack of orange and blue paper. I gave each student one piece of paper and asked them to write the letter A, T, C or G on it.
We went outside. We became DNA. We replicated. We understood DNA replication.
PPT vs. Smart Board vs. Paper.
Paper WINS!!
The moral of this story: Try something new. It may not work, but you won't know until you try. Always have a back up plan.
Today I have to rant. I'm going to rant about technology. You have been warned.
Courtesy of Motivated Networker
Over the past year as the Digital Literacy lead, I've done my best to investigate and try all sorts of new digital tools in the classroom. My students have been my guinea pigs as I try new things.
But the one tool I have tried to leave locked in the storage room is the Smart Board.
In the spirit of equity, I decided to do my best to give the Smart Board a chance to prove its usefulness in the secondary classroom. A few weeks ago, I spent 3 hours working with our CRT learning the in's and out's of designing a lesson in Smart Notebook. And I left with all sorts of good ideas on how to use the Smart Board in my class.
Courtesy of Teachable Moments
Then I searched high and low and found a Smart Board on wheels (locked in a storage room) that could be used.
And now the lesson. Okay. Open Smart Notebook on my computer. Stare at the blank screen. Watch the cursor flash. Check Twitter. Back to Smart Notebook. Watch the cursor flash. Check Facebook.
*Sigh*
Surely someone else has already designed a lesson on DNA replication for the Smart Board?
Of course! I'll just Google "DNA replication smart notebook". Done. Here it is.
Okay. Now let's get ready to teach.
The Smart Board does not roll nicely into my science lab--those pesky lab benches get in the way. So I booked rm. 117 and spent 40 min getting the Smart Board set up, played 'whack-a-mole' a few times to calibrate the board, and ran the lesson to make sure everything would work.
Bell rings. Students show up. So does another class. Double booked computer lab? No, I forgot to actually book the computer lab.
Unhook computer. Unhook LCD. Unhook Smart Board. Roll everything down the hall with 25 students following me sadly back to my classroom.
Set up everything. Play 'whack-a-mole' again. Realize that I can't actually USE the Smart Board--the lab benches are in the way. Get students to move desks. Set up everything. Play 'whack-a-mole' again.
25 minutes lost to 'technical difficulties'.
No worries. I have a great class who has learned to roll with the punches. I start teaching. There are notes, animations and activities embedded into this Smart Board lesson. The students get to touch the board.
They are engaged in the lesson. Success!
And then one (and then another, and another) says "I don't get it. How does DNA replicate?".
*silence*
I looked at the Smart Board. It stares blankly at me. I stared back.
Courtesy of Teachable Moments
We went outside. We became DNA. We replicated. We understood DNA replication.
PPT vs. Smart Board vs. Paper.
Paper WINS!!
The moral of this story: Try something new. It may not work, but you won't know until you try. Always have a back up plan.
Subscribe to:
Posts (Atom)